
Step 1 - Navigate to Infrastructure and Add an Option
- Open the opportunity you want to update from your Dashboard.
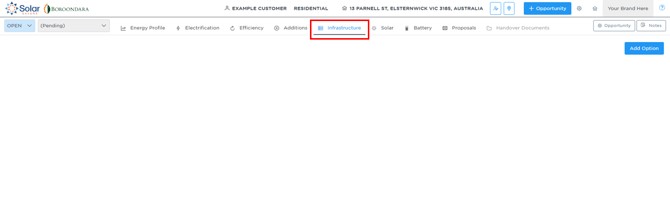
- Click on the Infrastructure tab in the top navigation menu.
- Click the Add Option button on the top right.
- In the Add Option dialog box, enter
Home Energy Assessmentas the label and click Add.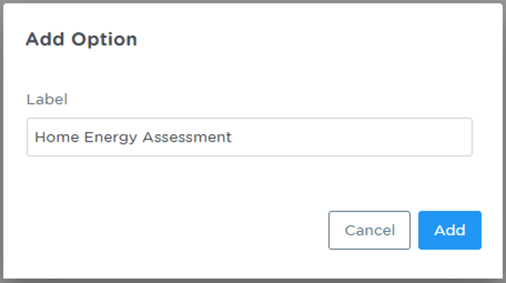
Step 2 - Add the Assessment as a Budget Line
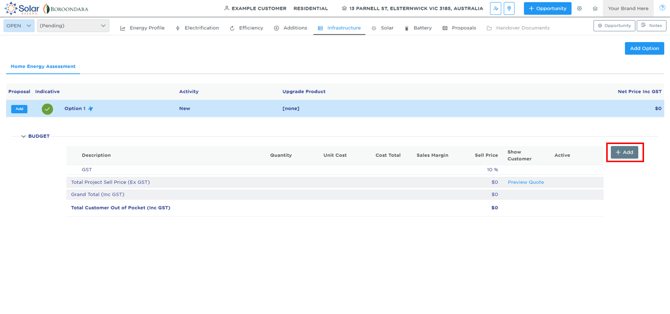
- Under the newly created option, locate the Budget dropdown section and click + Add to insert a new budget line.
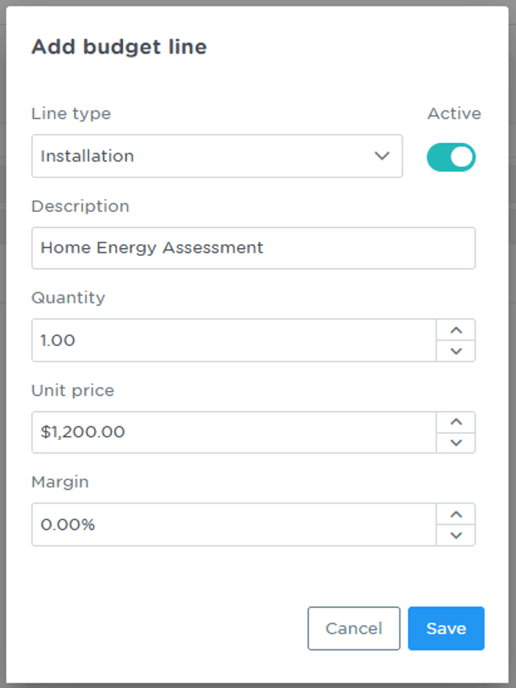
- Configure the budget line details:
- Line type: Select
Installation. - Description: Enter
Home Energy Assessment. - Quantity: Set to
1.00. - Unit price: Enter your final pricing (e.g.,
$1,200.00). - Margin: Set to
0.00%(or your preferred margin). - Active: Ensure the toggle is switched on.
- Line type: Select
- Click Save.
- In the main option row, click the Add button under the Proposal column to include the HEA option in the proposal, and ensure the Indicative column shows an X inside the grey circle (confirming it is non-indicative final pricing).
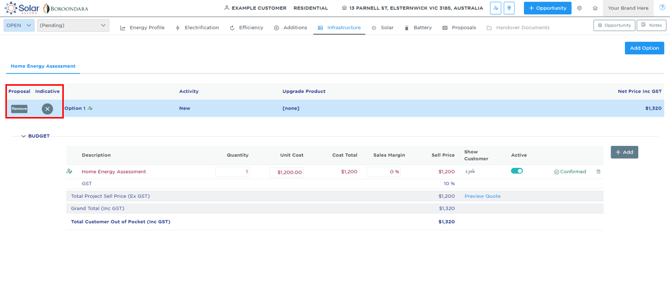
(Note: If you need to make adjustments, you can remove or edit the item here before proceeding).
Step 3 - Build the Proposal
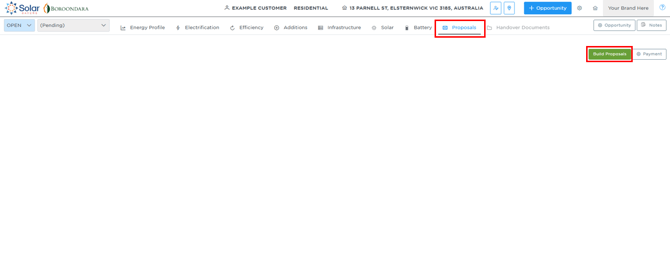
- Navigate to the Proposals tab from the top menu.
- Click the green Build Proposals button to generate the proposal view with your newly added item.
Step 4 - Mark the Proposal as Won
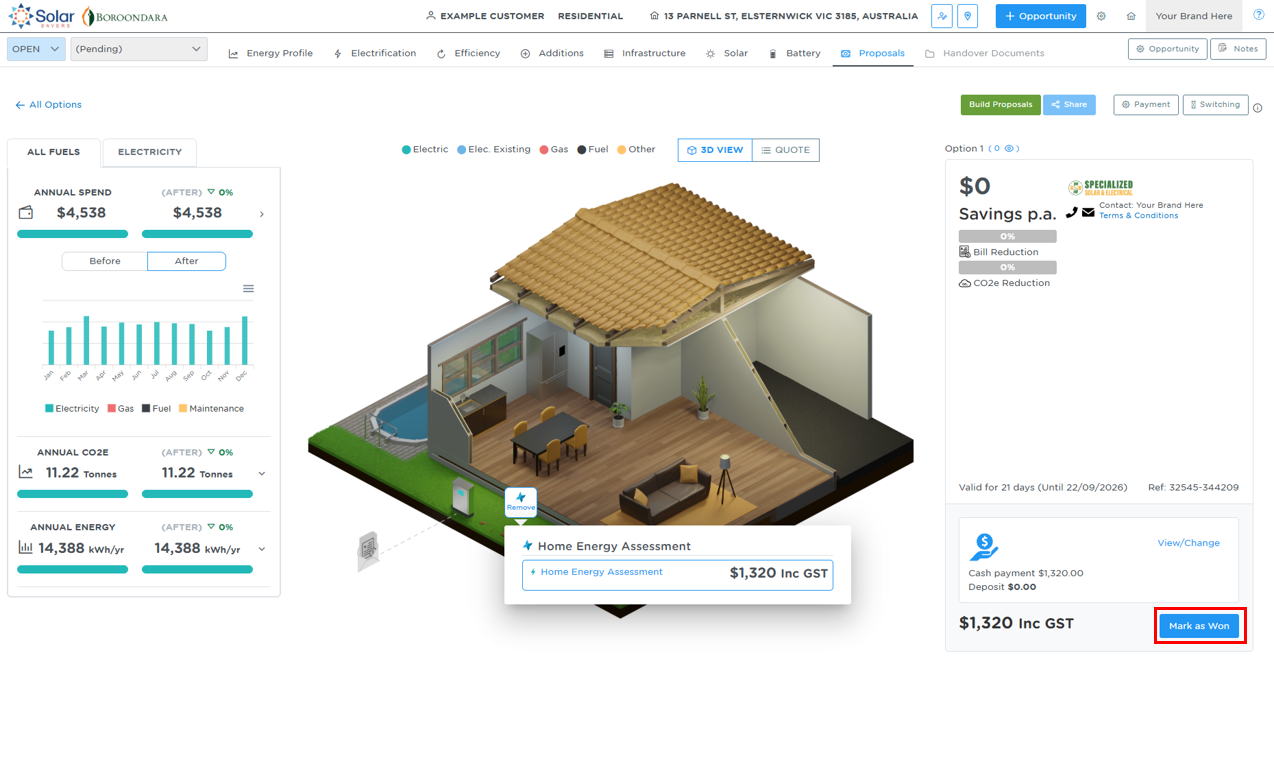
- Review the generated proposal to ensure the Home Energy Assessment item and final pricing are correct.
- On the bottom-right of the proposal page, click the Mark as Won button.
- In the confirmation dialog box, check the required confirmation boxes:
- I've provided the customer with a quote and terms regarding the sale, delivery, installation, maintenance and/or customer support of these products.
- The customer has accepted those terms and agreed to be bound by them.
- A signed copy of the quote has been received.
- Toggle the "Send confirmation email to customer" switch on or off depending on your preference.
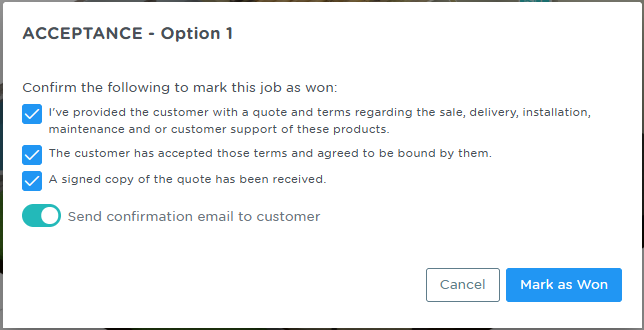
- Click the Mark as Won button to finalize. The order will now be considered won.
Managing or Cancelling a Won Order
The previous Mark as Won button will now become a dropdown bar that allows the installer to cancel it. Cancelling the order will bring it back to the previous stage.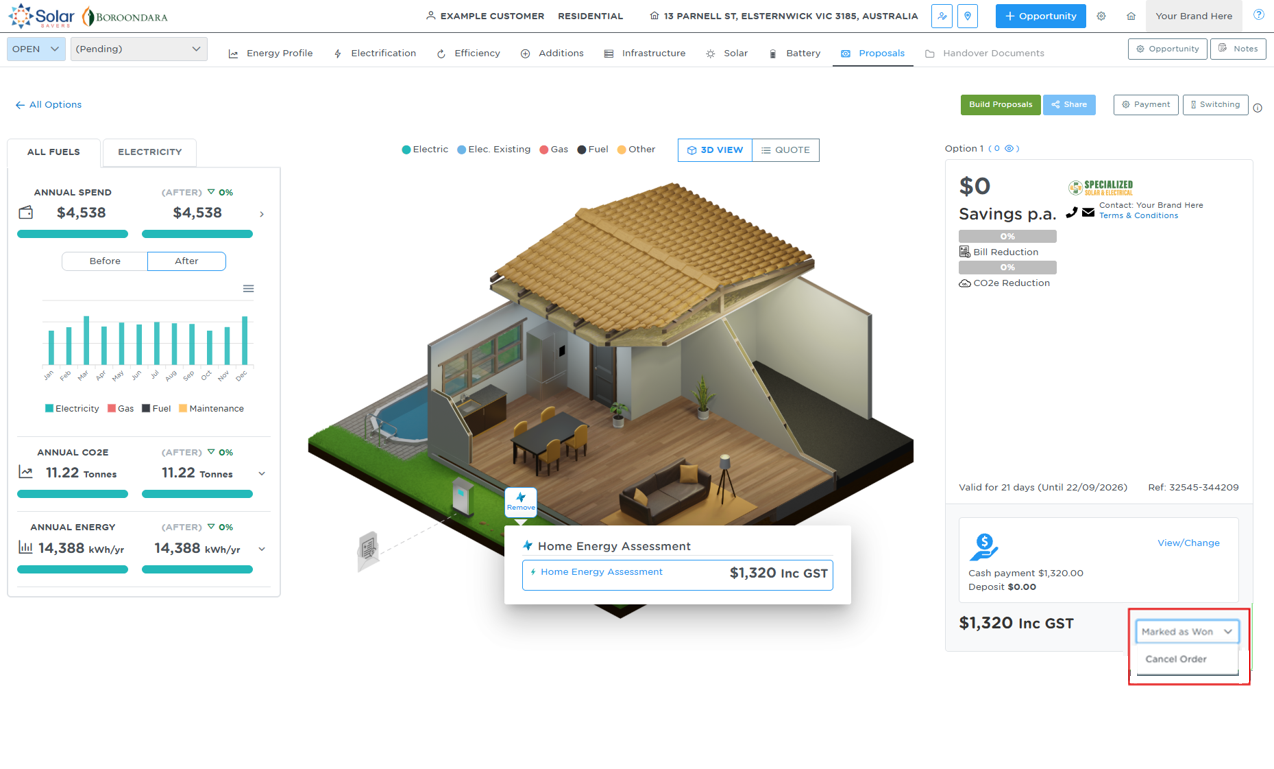
Notes:
- The opportunity must have existing items, and items must not be marked as indicative.
- Confirmation emails are sent to both the installer and the customer (if the confirmation email toggle is enabled) when an order is marked as won.